
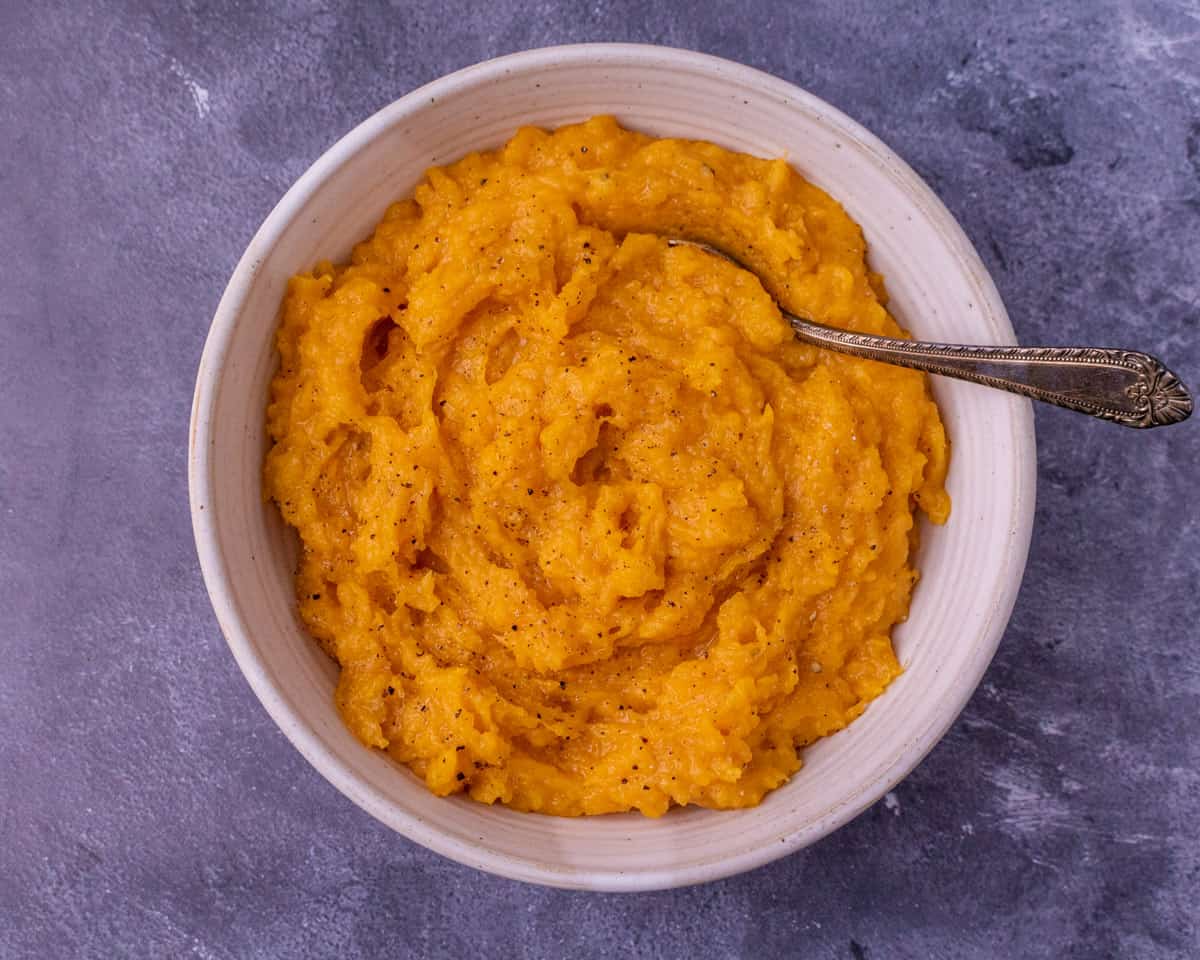
Mashed butternut squash goes with a bunch of different proteins and isn’t just for Thanksgiving or Christmas. Using a pressure cooker frees up space on your stove top or in the oven. This recipe comes together quickly with little active time especially if you buy already cubed butternut squash. It also reheats well so it can be made a day or two ahead of the big holiday.
Jump to:
Tips and Tricks
Can you make this ahead of time and reheat for a holiday? Yes, this recipe reheats very well, so you can make it the day or two ahead and reheat before serving.
Thanksgiving and Christmas menus are intense and often have a lot of moving parts. Make your life a lot easier by preparing this vegetarian side dish ahead of time.
How do you store leftover butternut squash? Once the butternut squash is mashed and flavored, leftovers can be stored in an airtight container in the refrigerator for up to five days. For longer storage, store in the freezer for up to three months in an airtight container.
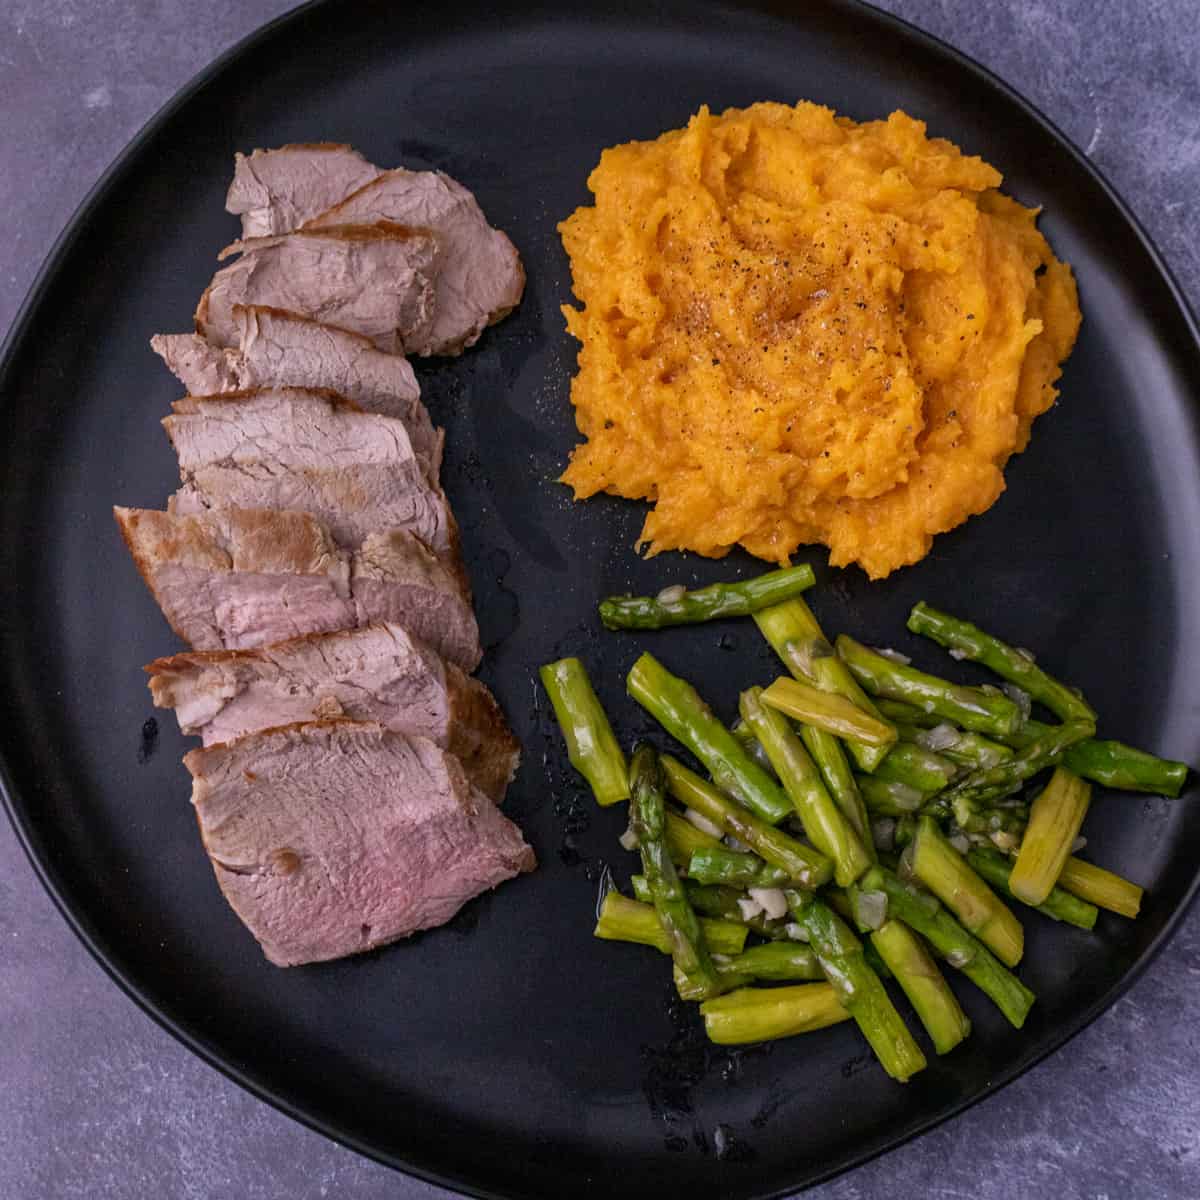
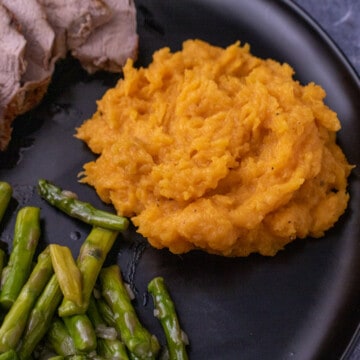
What do you pair with butternut squash? Butternut squash makes me think of fall and winter comfort dishes, so it’s often paired with warmly seasoned proteins like a Maple Mustard Pork Tenderloin.
Mashed butternut squash also works as a vegetarian side dish for Thanksgiving, Christmas, with pork chops, roasted chicken or steak too.
What do you do with leftover butternut squash? If you make too much butternut squash, which I seem to do every Thanksgiving and Christmas, I like to make this Leftover Butternut Squash Pizza with goat cheese, prosciutto and balsamic glaze.
You can also freeze the butternut squash for up to three months. Other ideas for leftovers are to make it into soup, sauce or a filling for ravioli.
Ingredients
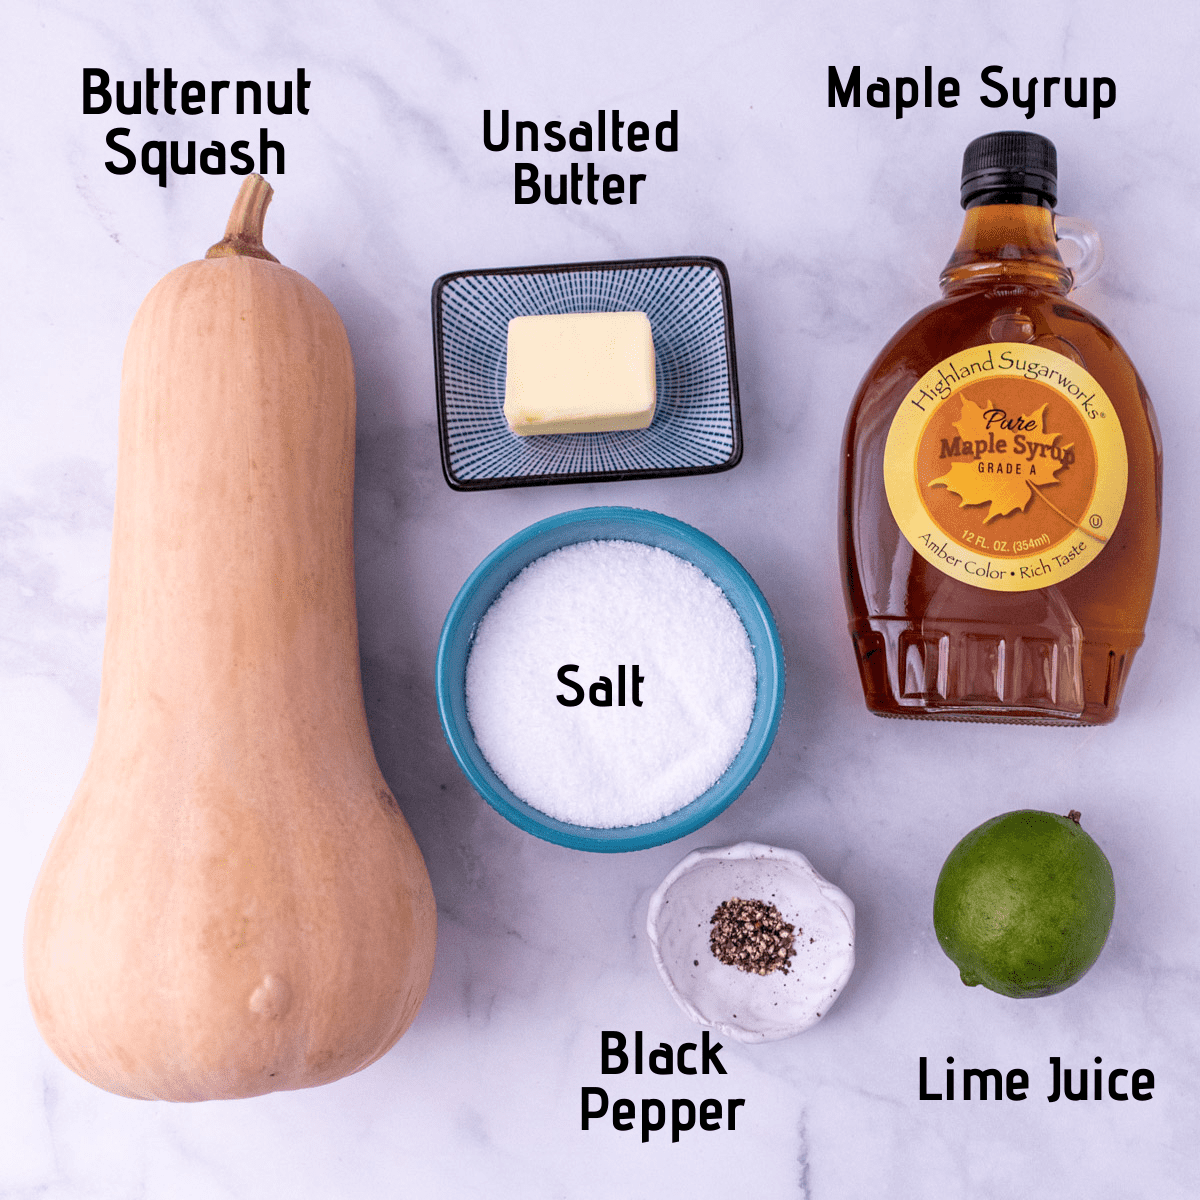
- Butternut squash - whole or already cubed and peeled
- Unsalted butter - any fat including a vegan variety works
- Maple syrup (affiliate link) - ideally use the real stuff
- Lime juice - apple cider vinegar or lemon juice works too
- Kosher salt - season to taste, use your favorite
- Black pepper - freshly ground is ideal
See the recipe card for quantities.
How do you buy butternut squash? When you’re looking to buy a whole butternut squash, you want one that is heavy for its size, that has no soft spots with the stem still attached. The skin shouldn’t be wrinkled but fairly smooth (small bumps okay.)
If you’re buying already cut butternut squash, look for no brown spots and that it is tightly wrapped.
How do you store uncooked butternut squash? If you bought a whole butternut squash that isn’t cut or peeled, store in a cool dark place for up to a month. If you bought the pre-cut and peeled butternut squash, store in an airtight container in the fridge for five to seven days. The less air that gets to it, the better.
Can you buy the already cut up and prepped butternut squash? Absolutely, there are very few vegetables that I buy already prepped and this is one of them. Even with a very sharp knife and plenty of space to work, I find cutting up and peeling butternut squash tedious and annoying.
The extra money I spend on already prepped squash is worth the time and effort. As a bonus the quality doesn’t suffer if you buy already cut up squash. The only difference is that the whole butternut squash will last a lot longer than the already cut up and peeled butternut squash.
Method
How do you cut and peel a butternut squash? First, microwave the whole squash for three minutes on high. This will slightly soften the squash but not cook it through. Using a sharp knife, chop off the ends and discard.
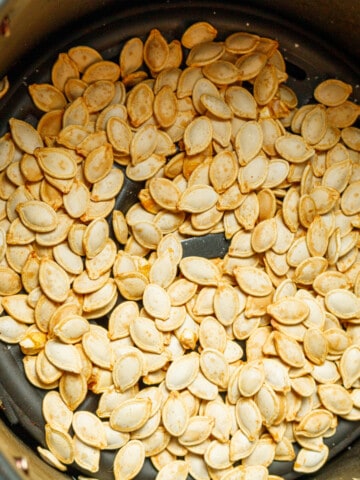
Next, cut the squash in half to separate the bulb from the neck, this makes it easier to handle. Cut each of these pieces in half and remove the seeds from the bulb halves with a spoon. You can discard the seeds or roast them.
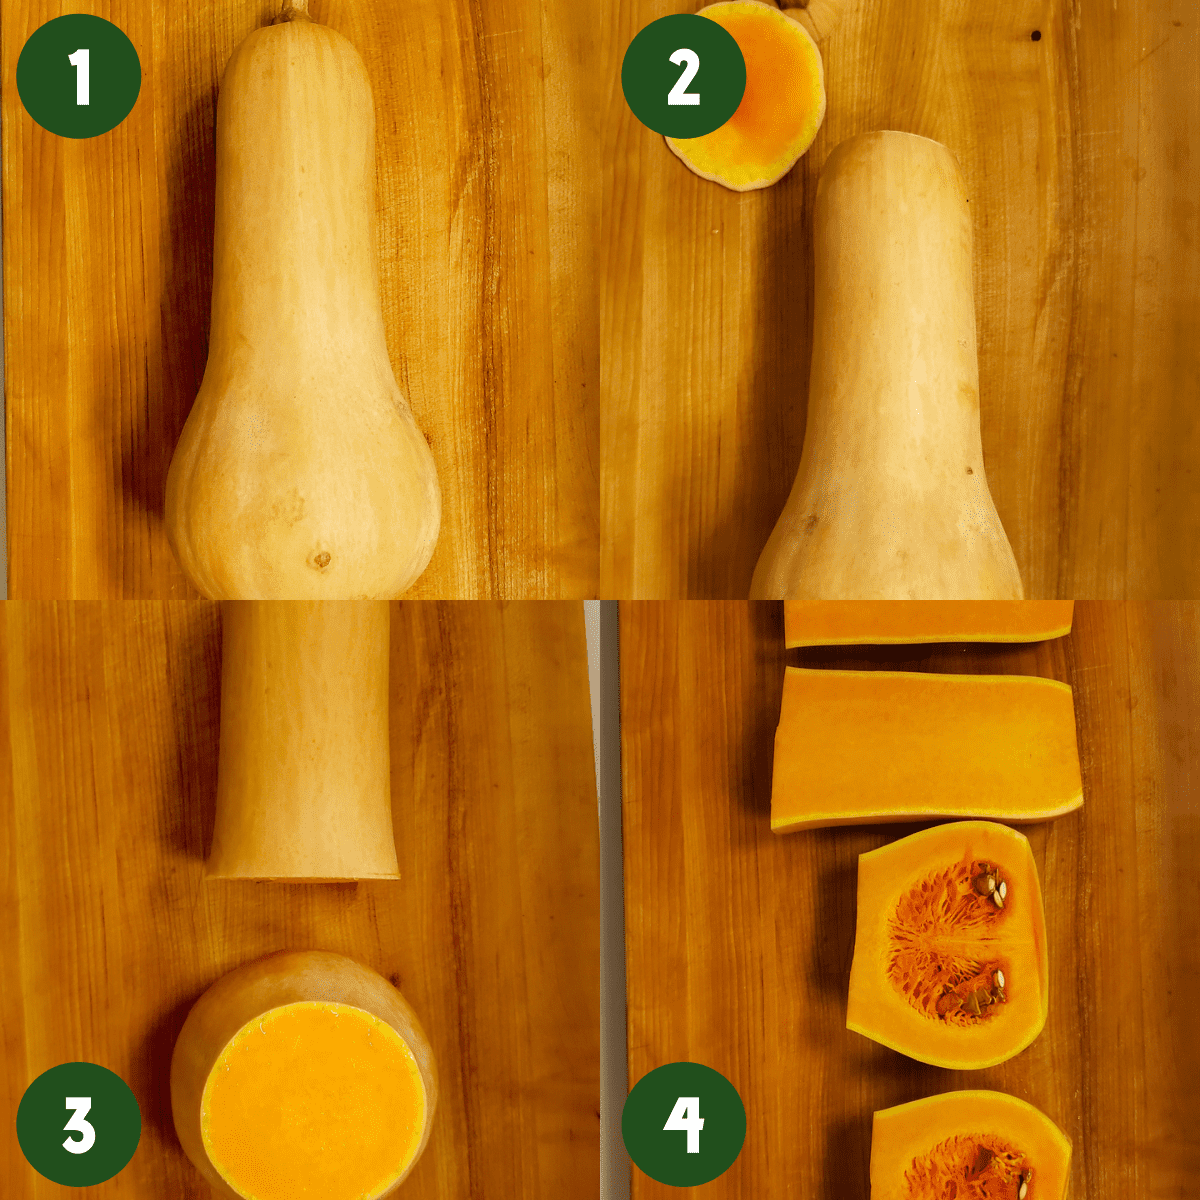
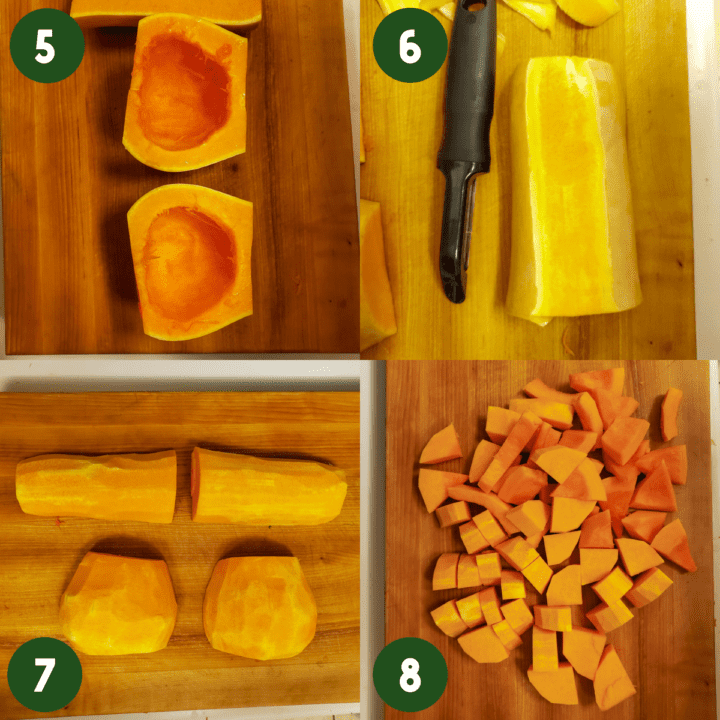
Peel the skin off of the four pieces with a vegetable peeler. The skin can be thick and tough and sometimes takes a few passes of the vegetable peeler to get to the flesh. Once this is done, cube into 1-2 inch pieces, trying to keep them even and proceed with the recipe.
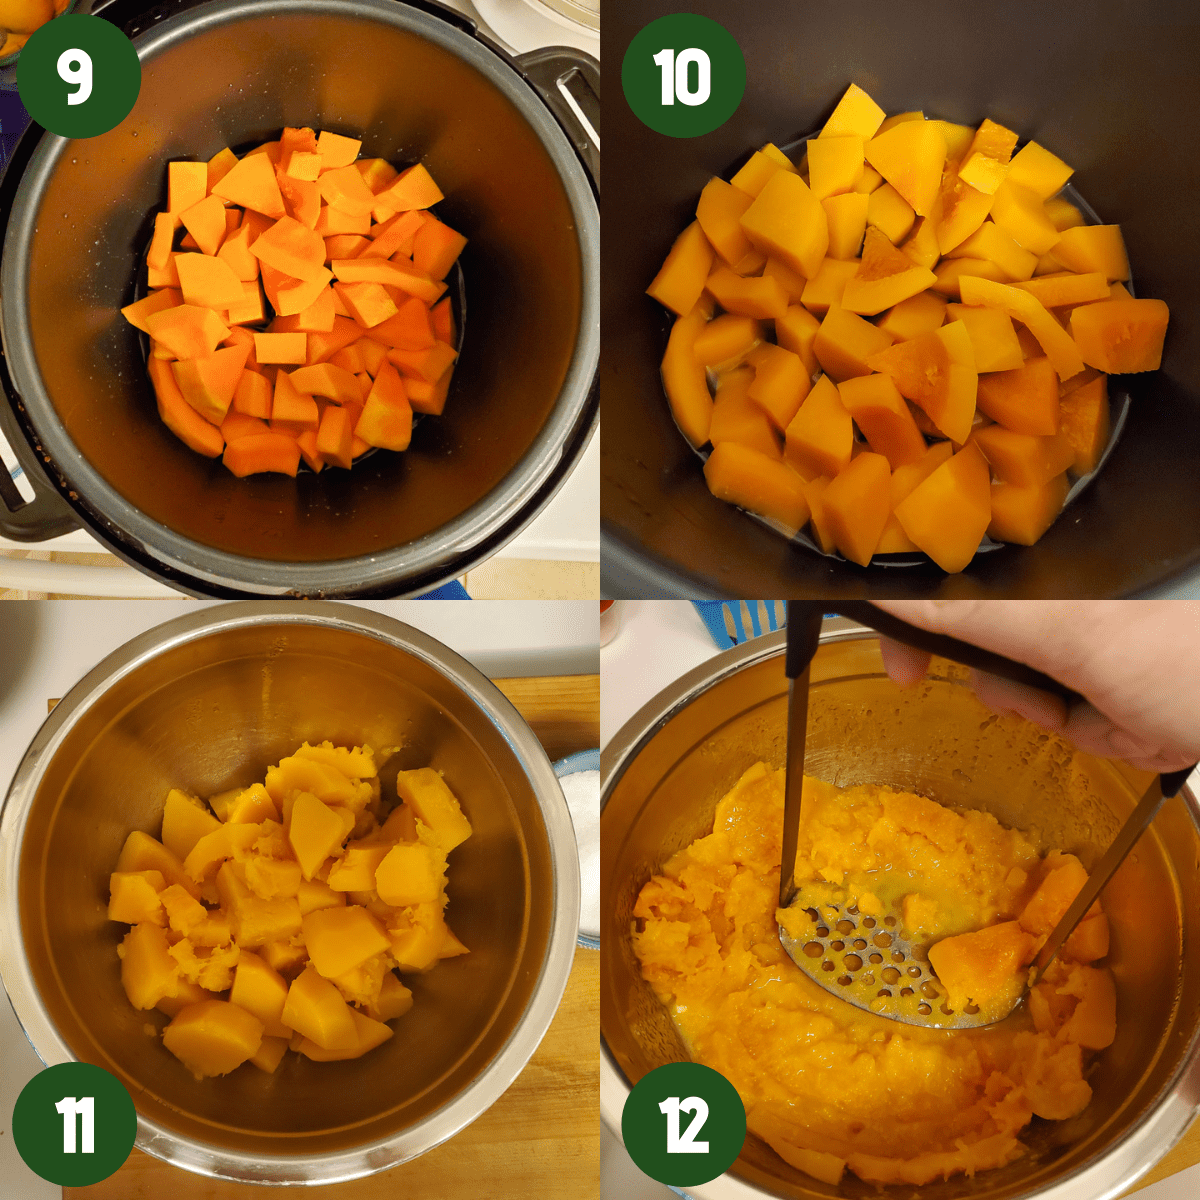
How do you make pressure cooker mashed butternut squash? Start with cubed and peeled butternut squash. Add one to one and a half pounds of squash into the electric pressure cooker (like an Instant Pot) and add one cup of water.
Seal and cook at high pressure for three minutes. Do a quick release after one minute and check squash; it should be soft and fork tender.
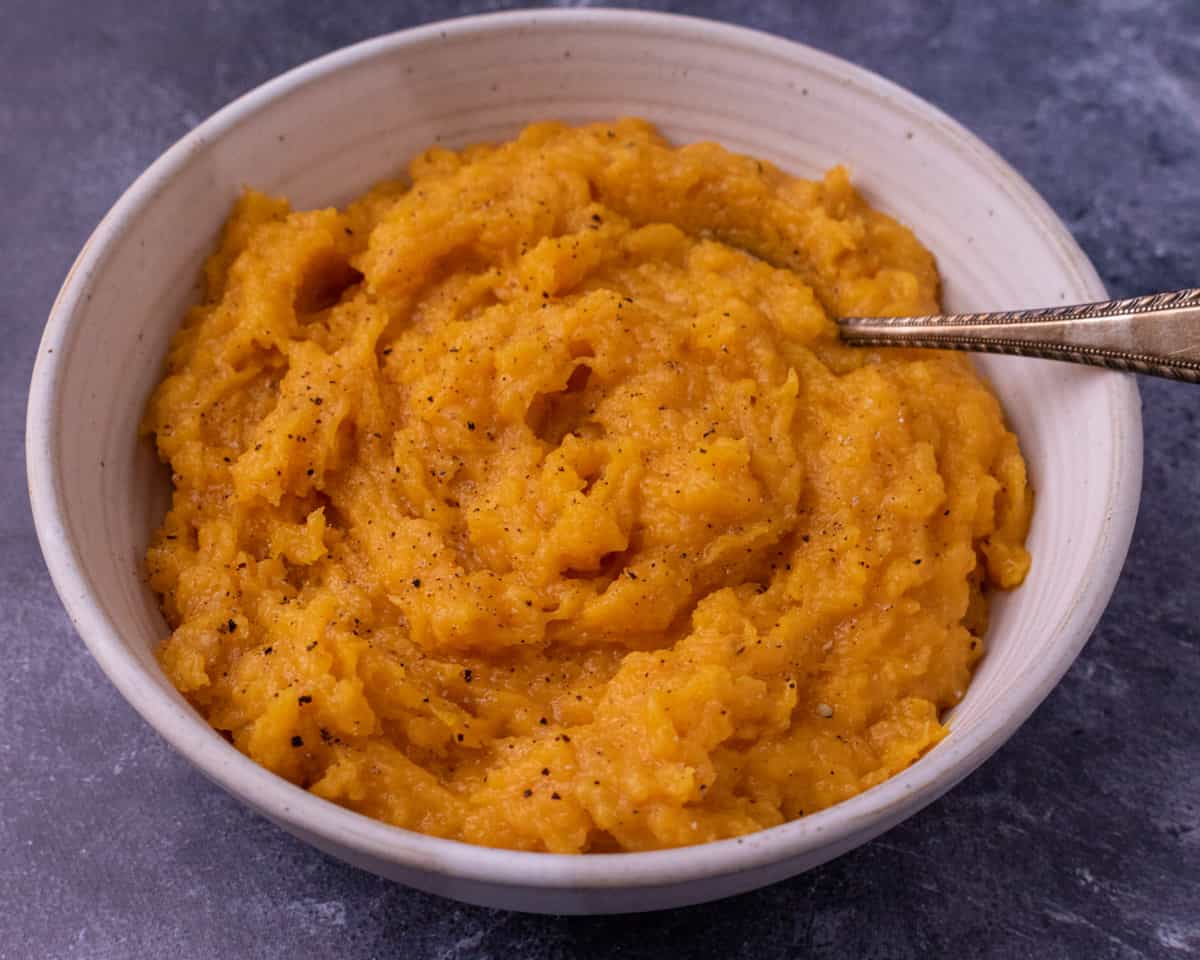
Remove the squash from the water with a spider and add to a large heat proof mixing bowl. Mash squash using a masher or forks and add in butter, maple syrup, and fresh lime juice. Mix well and season to taste with kosher salt and pepper and serve hot.
Do you peel butternut squash before cooking? If you buy a whole butternut squash, yes I recommend peeling it before cooking. If you buy the already cut up squash, the peel is likely removed.
Hint: Microwaving a whole butternut squash for three minutes will soften it enough to cut easier.
Substitutions
How can you make this a vegan side dish? Replace the butter with a vegan option like coconut oil, coconut cream or a vegan butter. Adding coconut flavored products may change the flavor a bit.
Variations
Mashed butternut squash is similar to mashed potatoes in that the options are endless in the flavor department. Try using any of the following flavor profiles
- Pumpkin pie spice, cinnamon or nutmeg
- Fresh sage and browned butter
- Garlic, thyme and cream
Equipment
What’s the best type of pressure cooker to use? These instructions were written for any electric pressure cooker like a Crockpot Express (affiliate link) or an Instant Pot (affiliate link). You can use a stove top one but the timing and instructions may be different.
Top Tip
Buy already cubed and peeled butternut squash to save a lot of hassle!
Pressure Cooker Mashed Butternut Squash
Ingredients
- 1 - 1 ½ pound of cubed butternut squash or 1 medium squash
- 1 cup of water
- 3 tablespoons unsalted butter
- 2 tablespoons maple syrup
- Juice from ½ of a lime
- Kosher salt to taste
- Freshly ground black pepper to taste
Instructions
- Add 1 - to 1 ½ pounds of cubed, peeled butternut squash to the pressure cooker. Add 1 cup of water and seal according to the manufacturer’s instructions. Cook on high pressure for 3 minutes. After cooking, do a quick release 1 minute later.
- The butternut squash chunks should be fork tender and soft. Remove the butternut squash from the water and add to a large heat proof mixing bowl.
- In the large mixing bowl, using a masher or forks, mash the butternut squash. It should mash easily.
- Once mashed, add in remaining ingredients and mix well. Taste for seasoning and slowly add kosher salt until it tastes flavorful.
Notes and Accommodations
- It is easier and quicker to buy already prepped and cubed butternut squash. No quality is lost if you choose this route although it may be a few extra dollars.
- If prepping your own butternut squash, microwave the whole squash for 3 minutes on high. Then remove the ends. Using a very sharp knife, cut in half where the bulb starts. Cut each piece in half. Scoop out the seeds with a spoon from the bulb and discard. Peel each piece with a vegetable peeler and then cut into cubes. Proceed with the recipe.
- Store leftovers in the refrigerator for up to 5 days in an airtight container or in the freezer for up to 3 months.
- Leftovers can be used to make pizza with goat cheese, prosciutto and balsamic glaze.
This recipe was originally posted on August 26, 2020. It was republished with clearer instructions and more information on April 10, 2022.
Food Safety
- Cook to a minimum temperature of 165 °F (74 °C)
- Do not use the same utensils on cooked food, that previously touched raw meat
- Wash hands after touching raw meat
- Don't leave food sitting out at room temperature for extended periods
- Never leave cooking food unattended
- Use oils with high smoking point to avoid harmful compounds
- Always have good ventilation when using a gas stove