Change up your meal planning with homemade lunchables for adults. Make them different each week by changing up the types of cheeses, meats and produce you use. This is a quick prep, no cook, cold meal prep idea for when you’re low on energy and time. Retire sandwiches and salads this week and enjoy a mini charcuterie board.
Jump to:
Tips and Tricks
How long can you store adult lunchables? Adult lunchables will last two to three days in the fridge. I recommend not packing them farther in advance as some of the items may go stale in the fridge. Often, I’ll prepare the cheese and produce and store separately until I’m ready to pack the night before with the rest of the ingredients.
How do you know what goes together? This varies on the person. I recommend starting with the two to three cheeses you want to use and pairing to those. Think about color, texture and flavors when pairing cheese, but remember there is no wrong way to combine ingredients.
If I have a lot of meat and cheese I’ll add color with cucumber, carrots, fruits or jams. If I have a lot of soft textures with meats and cheeses, I’ll add nuts or crackers. Adding salted nuts, olives or pickles can help if you have spicy or sweet meats and cheese. Sometimes I just put odds and ends together from the fridge and pantry.
Do you have to pack everything together? Nope! It looks a lot better in photos to have everything in a cute container, but I find my crackers or nuts get soggy next to high moisture produce or fruit. I opt to separately pack them with reusable stasher bags (affiliate link) or something similar. To keep ingredients with higher moisture separate I also sometimes use silicone baking cups (affiliate link).
What can you serve with an adult lunchable? Grown up lunchables are like a mini snack board for a meal. A side salad, soup or sandwich would go great with a homemade adult lunchable. However, I don’t need more than the mini charcuterie board I’ve packed for myself.
Ingredients
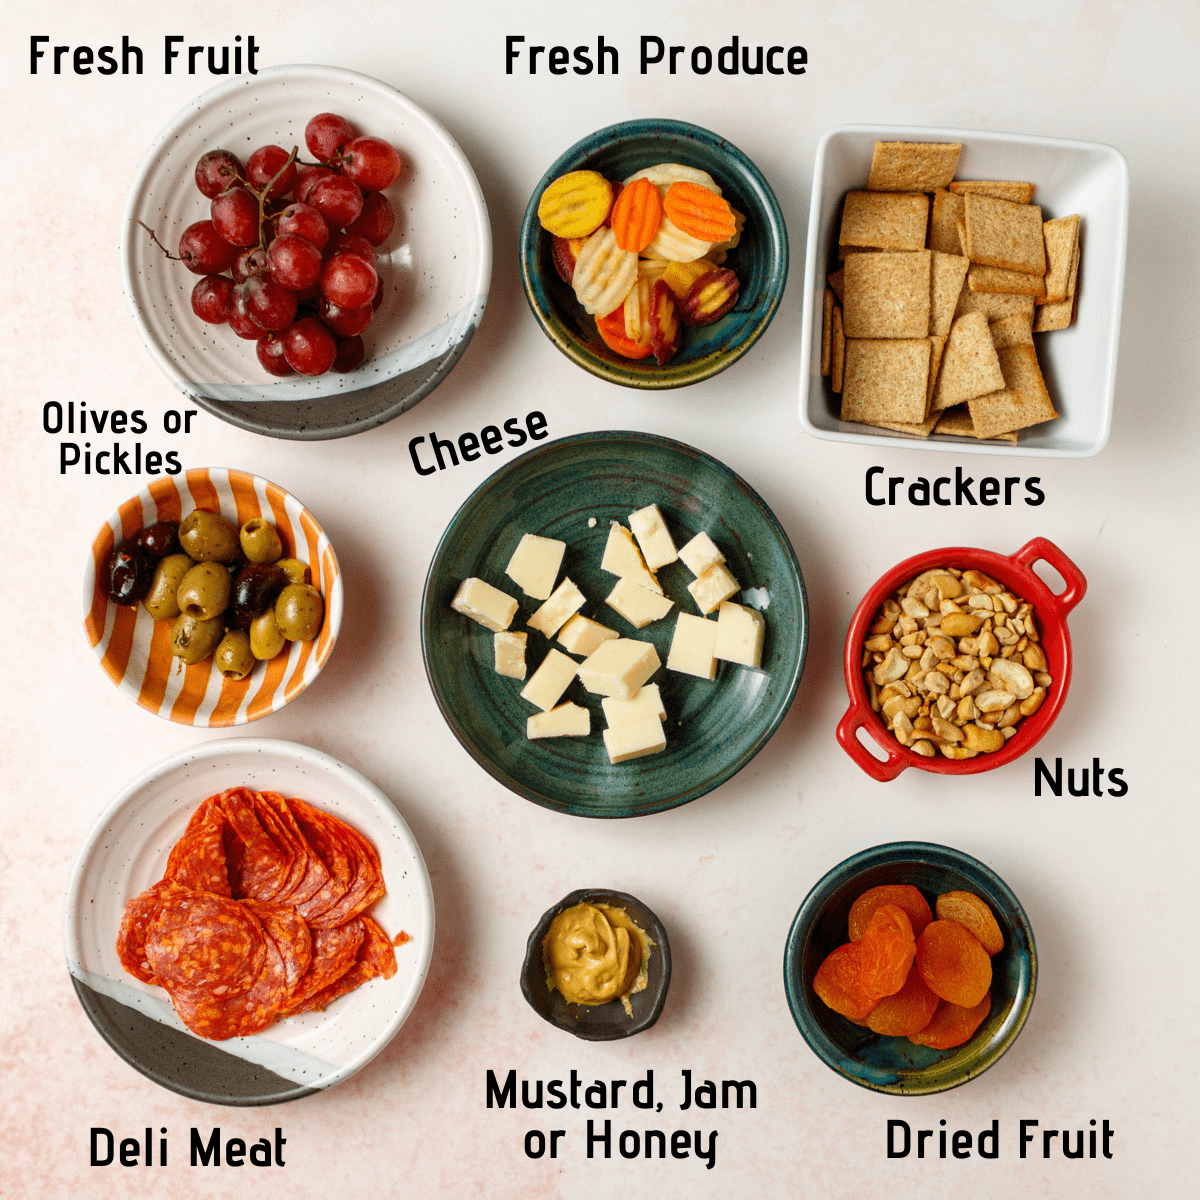
Any brands you can find and like will work here! These are guides in case you get stuck or overwhelmed by the choices.
- Cheese - two different types, different in texture or flavor
- Crackers - Plain or mild flavored crackers
- Sliced charcuterie or deli meat - your favorite smoked meat, deli meat or charcuterie
- Shelled and roasted nuts or seeds - avoid using shell on nuts and seeds for easy snacking
- Fresh vegetables - use to add freshness and crunch with carrots, cucumbers, or snap peas
- Dried fruit - great way to eat out of season fruit and add texture with dried pineapple, dried apricot or raisins
- Fresh fruit - adds freshness and sweetness with berries, apples, clementines
- Pickles or olives - optional but will cut through the richness of meats and cheese
- Honey, jam or mustard - optional
- Dark chocolate - optional, bite sized pieces
See recipe card for specific quantities.
What types of ingredients should you avoid? Avoid ingredients you don’t like or are allergic to. You can pick any kind of cheese or other ingredients but would caution packing dry ingredients right next to high moisture ingredients.
How many cheeses do you use? I recommend using one to three different types of cheeses. Often I have a lot of odds and ends of cheeses to use up, so this is a great way to make sure I’m not being wasteful.
What kind of cheeses should you use? Pick one cheese and then pick another cheese that is a different flavor/texture or milk type. If you have two types of cheeses that are very similar, you might as well be eating the same cheese. You want them to stand out against each other.
For example for flavors: spicy/garlic and herb/cranberry. Texture is something creamy (like a chevre or brie) compared to something crumbly and drier (aged gouda or cheddar). And finally by different types of milk like cow/buffalo/sheep/goat. A goat cheddar is going to be tangier than a cow cheddar. If you’re not sure, ask your local cheese counter and deli staff.
What kind of meat do you use? I usually go for salami, pepperoni, speck, prosciutto or chorizo. You can find these types of cured meats in a range of flavors (sweet or spicy) and they add a nice smoke/meat/salt addition to your cheese plate. Make sure you like eating it cold/room temperature because otherwise you’ll need to pack it separately to heat it up. Summer sausage is also a great addition.
Do you use fresh or dried fruits? It depends on what is in season. In the winter, I use a lot more dried fruits because my options are limited for fresh fruit. But if I have the choice, I use a combination. I like the amount of things you can get in a dried variety (like figs, apricots, mangos, pineapple etc) as well as their different textures. However, nothing beats fresh raspberries in the summer. I love fresh berries or grapes with dried mango or apricot.

Popular Pairings Ideas
- Aged cheddar cheese, dried mango and salami
- Mild cracker with goat cheese, honey and prosciutto
- Blue cheese and chocolate covered almonds
- Gouda, pepperoni and mustard
- Spicy jack cheese with pickles
- Herbed goat cheese with strawberry jam on a baguette
- Havarti, pear and honey
- Smoked gouda and apples or grapes
- Alpine cheese and pickles
If you’re looking for more inspiration, you can check out my holiday and seasonal cheese boards.
Method
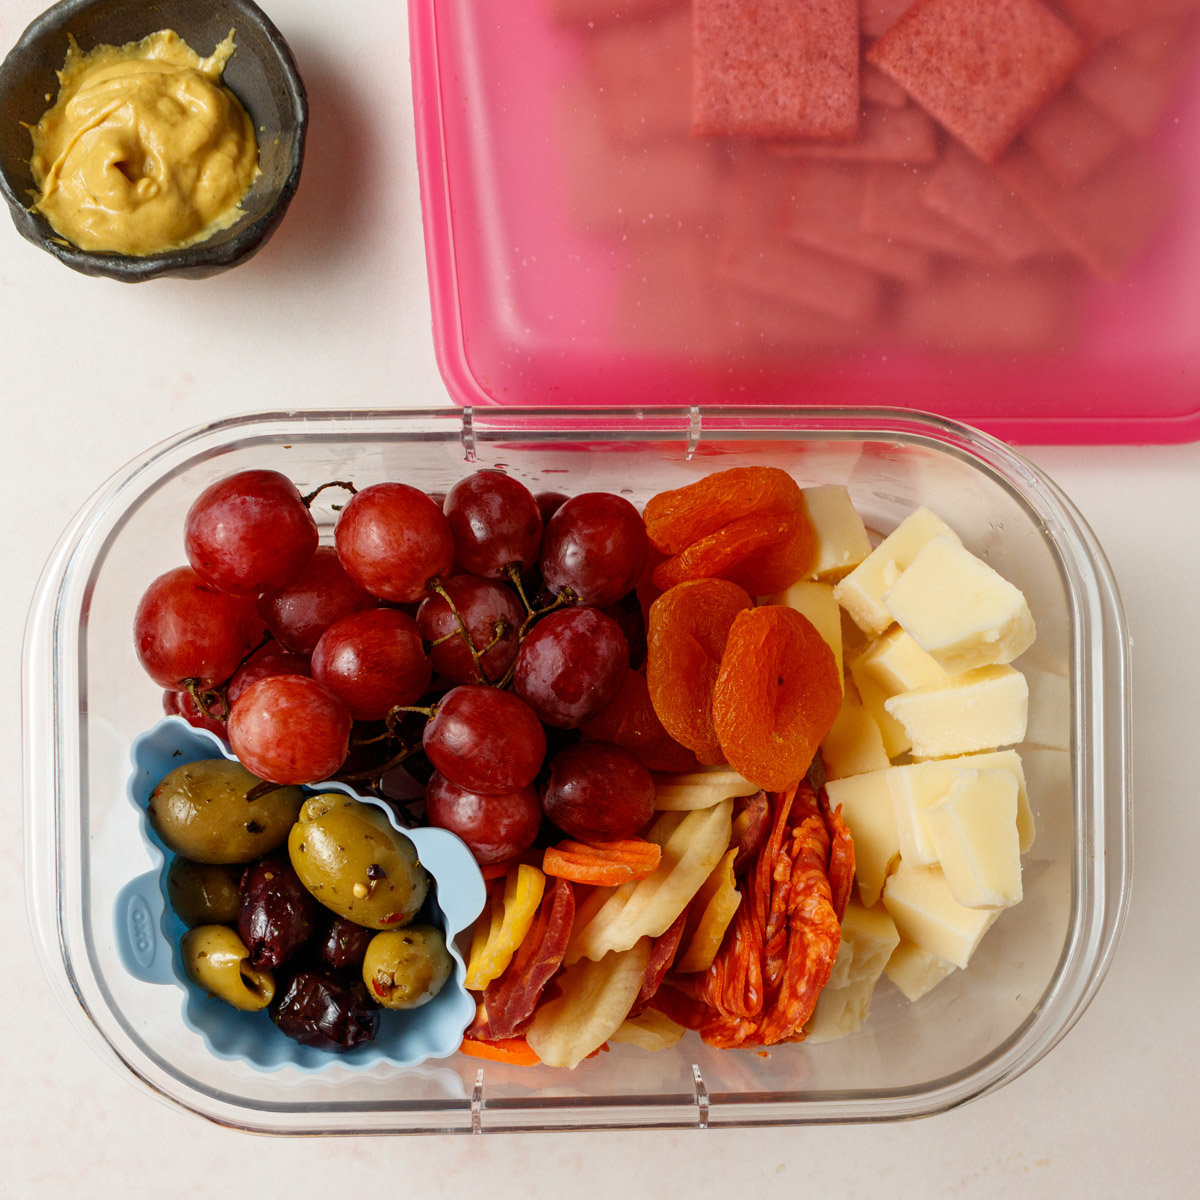
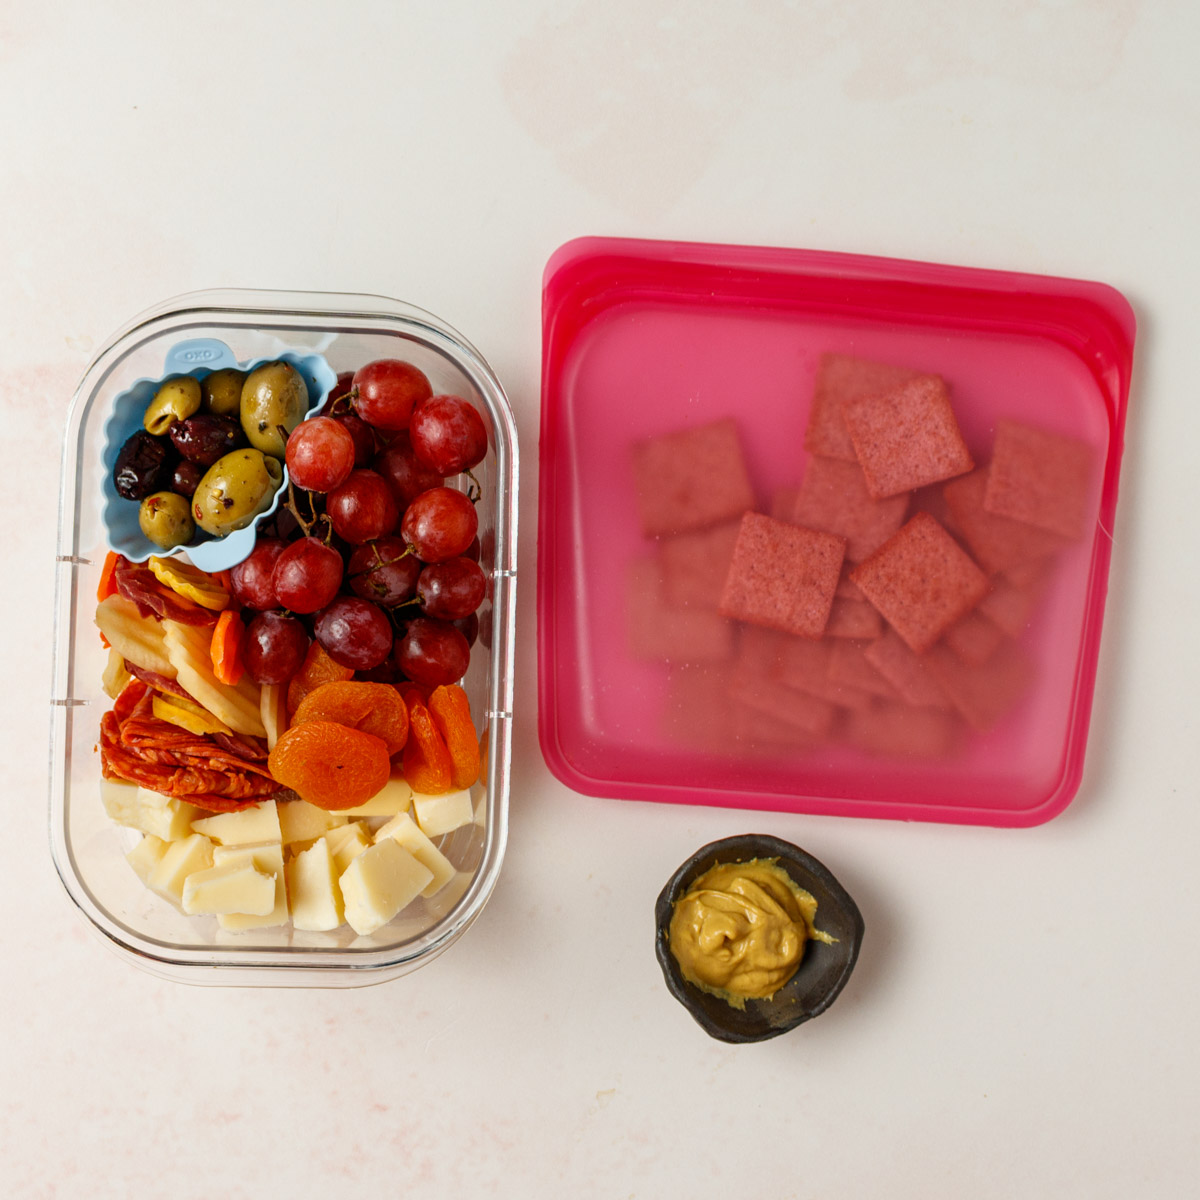
How do you pack an adult lunchable? Start by cutting up any firm cheese into cubes, chopping up any large pieces of fruit and vegetables into bite sized pieces. To the food storage container add meat and cheese in the center. Add in wet ingredients like fresh fruit, olives, pickles and fresh produce. In a small container add mustard, jelly or honey. On the side pack dry goods like crackers and nuts.
Hint: Use up whatever you have in the fridge! If you have a half a leftover cucumber and a handful of nuts, this is the perfect use for them.
Variations
This recipe is a guide on where to start, there are a lot of different flavors to play with here.
Can you add dessert/something sweet? Yes! If you have a sweet tooth and want to add a few pieces of dark chocolate or chocolate covered nuts or fruit that will go well with a lot of cheeses.
- Cheese - use more than two or just one type of cheese, whatever works
- Crackers - can also use baguettes, naan, pretzels or pita bread
- Sliced charcuterie or deli meat - hard boiled eggs, smoked sausage, air fryer chicken sausage
- Shelled and roasted nuts or seeds - crunchy chickpeas or beans
- Fresh vegetables - substitute in season fresh fruit
- Dried fruit - substitute in season fruit
- Fresh fruit - substitute in season produce
- Pickles or olives - kimchi or something fermented
- Honey, jam or mustard - Hummus, whipped feta dip
- Dark chocolate - chocolate covered nuts or fruits, peanut butter cups
Equipment
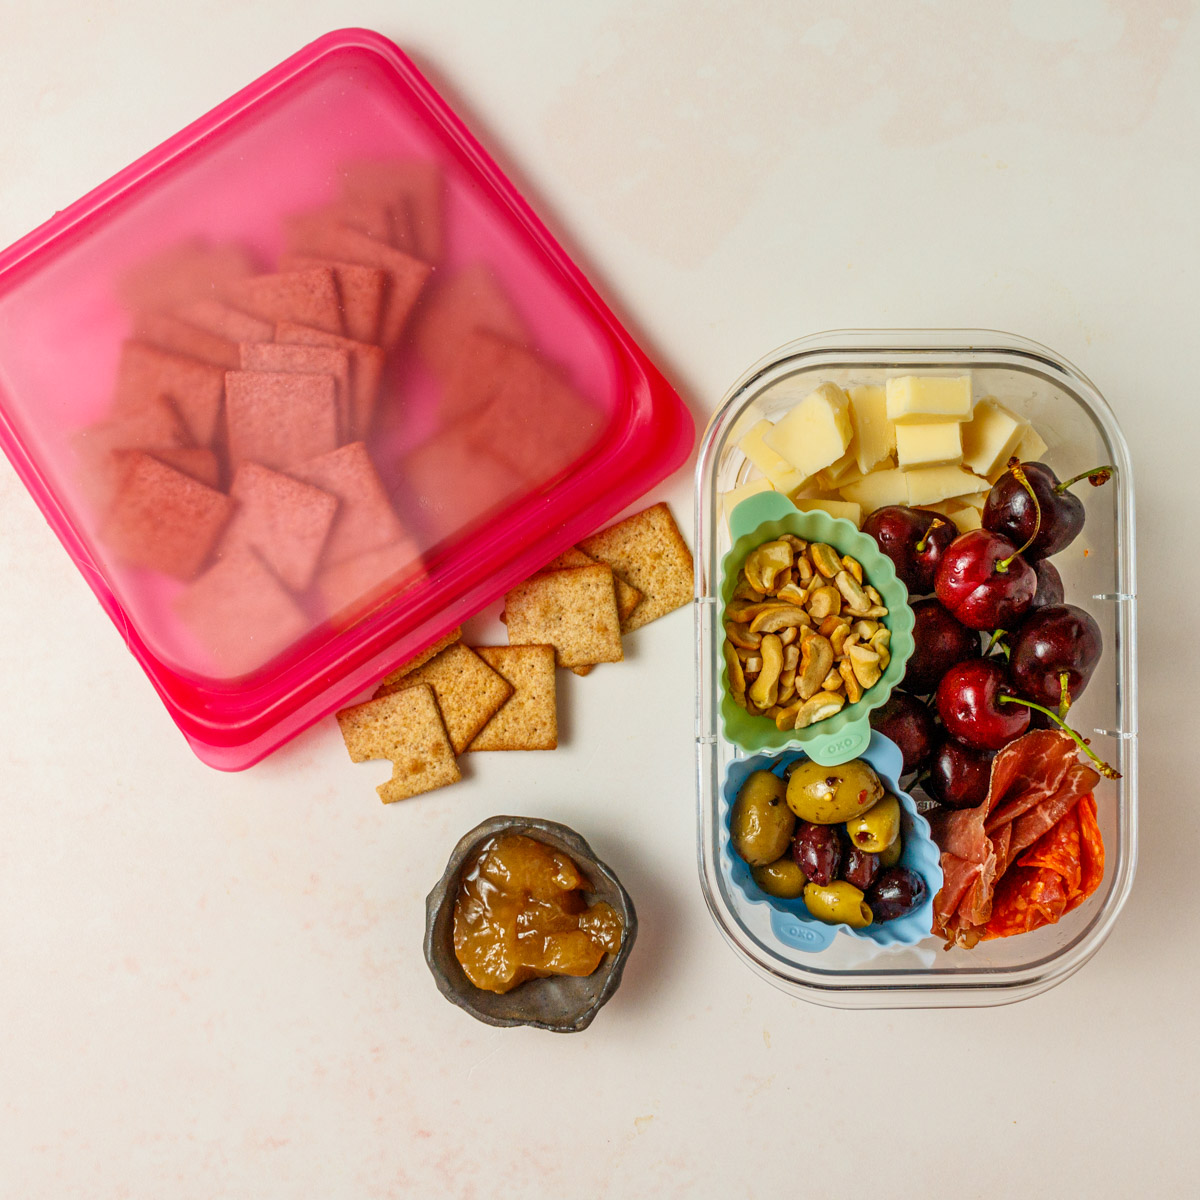
What kind of containers do you use? I use OXO 3.5 cup glass containers (affiliate link) but any type of air tight container will work. Glass containers that are multipurpose so I avoid the ones with dividers.
Sometimes I can’t fit all of my crunchy items together so I’ll also use a stasher bag (affiliate link) to store crackers or nuts. I recommend using what you have! Another option to keep ingredients separate are silicone baking cups (affiliate link).
Top Tip
Store wet ingredients like cucumber, olives and fresh mozzarella separately from crunchy things like nuts and crackers.
DIY Adult Lunchables
Ingredients
- 1 ounce each of the 2 different types of cheese
- 1 ounce meat
- ⅓ cup fresh vegetables
- ⅓ cup fresh fruit
- ¼ cup pickles optional
- 2 tablespoons dried fruit
- ¼ cup crackers
- ¼ cup shelled and roasted nuts or seeds
- 1 tablespoon dark chocolate optional
- 1 tablespoon jam honey or mustard (optional)
Instructions
- Start by cutting up any firm cheese into cubes and meat into small pieces. Next chop up any large pieces of fruit and vegetables into bite sized pieces.
- Add meat and cheese to the food storage container.
- Next add in wet ingredients like fresh fruit, olives, pickles and fresh produce.
- In a small container add mustard, jelly or honey and place gently on top or on the side.
- On the side pack dry goods like crackers and nuts.
Notes and Accommodations
- The amount of each item is just a guideline so you know how much to buy at the store if it’s your first time.
- The best way to pack the lunchable is with the larger items first to make sure it all fits. Fill in with smaller ingredients or use a second container if necessary.
- Store any high moisture item separately from crunchy items like nuts or crackers.
- Store in the fridge in an airtight container for 2-3 days.
Originally posted May 15, 2019. Updated on December 9, 2019 and again on January 27, 2023 with new tips, tricks and a recipe.
Food Safety
- Cook to a minimum temperature of 165 °F (74 °C)
- Do not use the same utensils on cooked food, that previously touched raw meat
- Wash hands after touching raw meat
- Don't leave food sitting out at room temperature for extended periods
- Never leave cooking food unattended
- Use oils with high smoking point to avoid harmful compounds
- Always have good ventilation when using a gas stove


