Tips and Tricks
Why do you spatchcock a chicken? When you spatchcock a chicken and roast it in the oven, it roasts a lot faster and more evenly. Because the chicken is flatter, the breasts and the thighs cook more evenly and end up done at the same time. Unlike with a traditional roasted chicken, the breasts stay juicy and the thighs cook all the way through.
Do you need to rinse your chicken? No! Do NOT rinse your chicken. This is an old wives tale to “get rid of the germs” on raw chicken. It has been proven that rinsing your chicken actually is more likely to spread bacteria throughout your kitchen from splashback. Pat your chicken dry with paper towels but do NOT rinse it. To avoid getting sick, simply be mindful of cross contamination and roast your chicken until the meat is white and the juices run clear.
Why are you only cooking the chicken to 155 F? If you cook chicken breast until it is 165 F internally a lot of times the end product will be dried out. The internal temperature will rise another 10 degrees while it is resting. To keep it juicy, cook to 155 F and allow the carryover heat to continue cooking it the last 10 degrees. If you’re looking for more information on the temperature of proteins you can check out this blogpost from Thermoworks.
What type of meat thermometer do you use? I have two different meat thermometers that I use; both are from Thermoworks. I’ll be honest, they are a little pricey but they are worth it and I’ve had both for over two years without any issues or concerns. I have the Thermapen Mk4 which I use almost every day. It gives accurate readings quickly, has a great battery life, splashproof and has a fantastic range of temperatures it’s accurate in. They often go on sale, so keep an eye out. The other one I have is an alarm type thermometer which comes in handy for recipe testing and for large cuts of meat (like chicken!) that can vary in size and shape, the DOT Simple Alarm. I believe in quality products if you use them a lot. They do NOT sell on Amazon and I’d hesitate to recommend any of those products. If those are out of your price range, the ThermoPOP is a great budget buy. I make zero money from recommending them, I just love their products.
Why do you wait to glaze the chicken with BBQ sauce? If you add the BBQ sauce at the beginning of the cooking, it will absolutely burn by the time the chicken is fully cooked. Adding the sauce towards the ends avoids burnt BBQ sauce flavored chicken but still makes the skin glazed and delicious.
Method
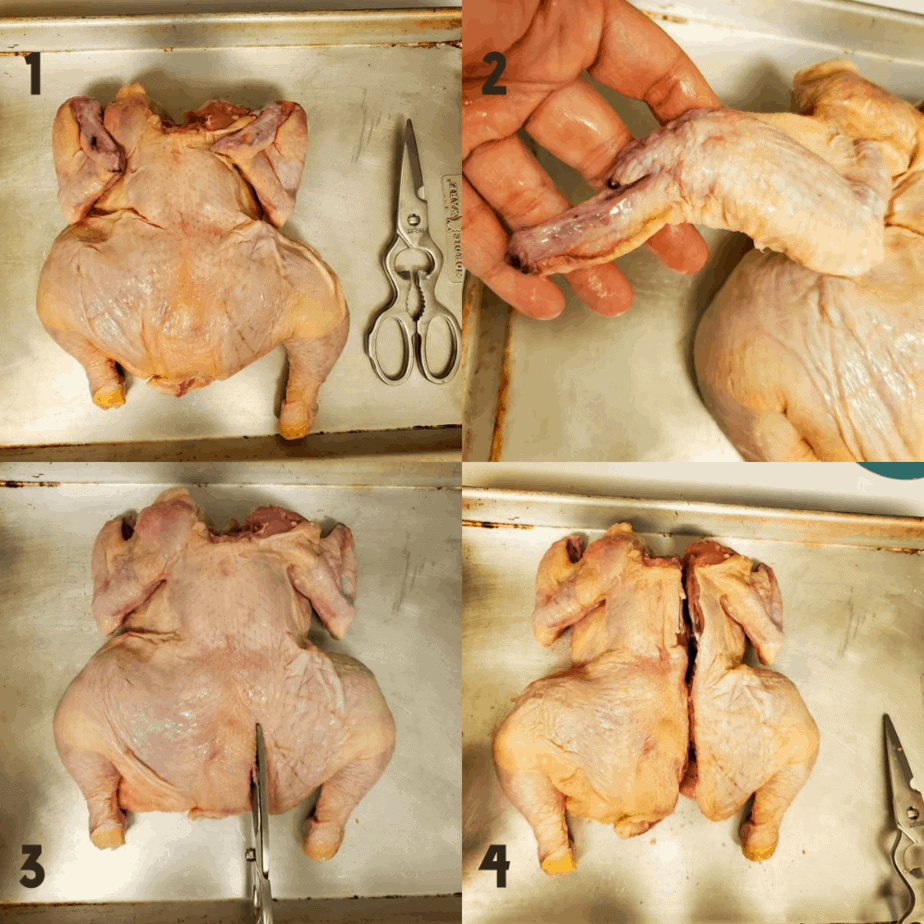
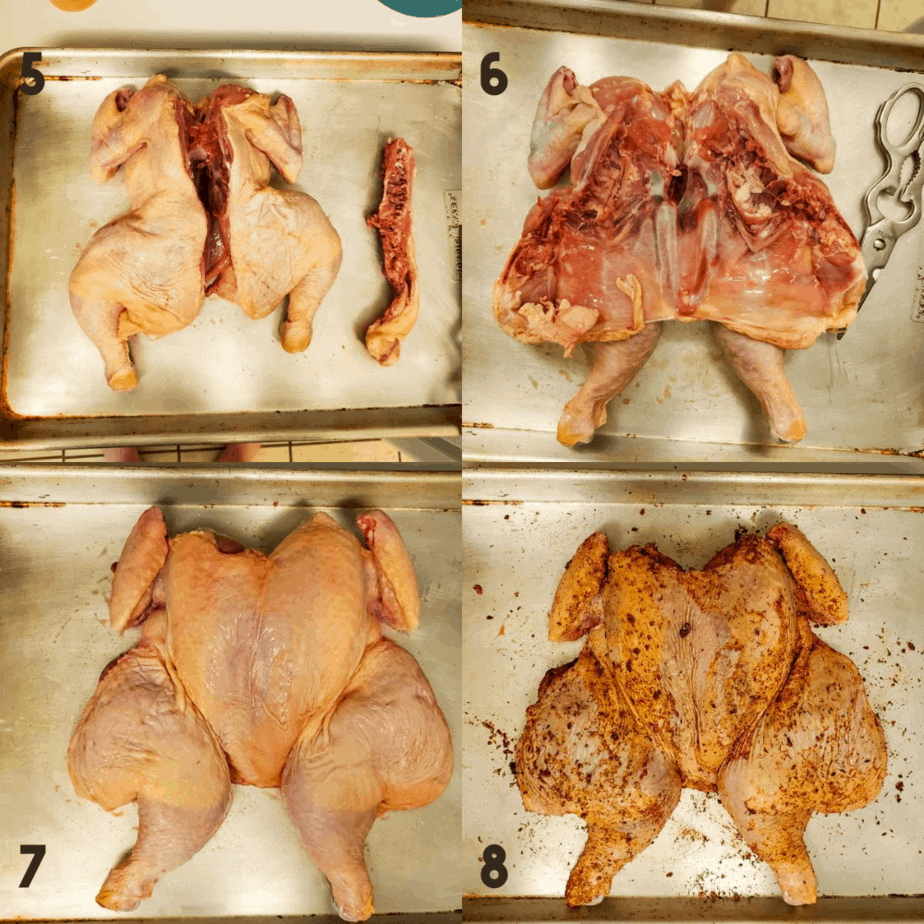
How do you spatchcock a chicken? The best tool to use to spatchcock a chicken is kitchen shears. You can do it with a knife but it’s much harder unless your knife is extra sharp and you’re very familiar with the process. Another option is to ask the butcher at your store to do it for you, just make sure they give you the backbone back for stock! To spatchcock a chicken start with the breast on the bottom and the backbone facing you. Make one cut starting at the bottom (where the legs are) of the chicken and going towards the neck (where the wings are) on one side of the backbone. You’re going to cut through the ribcage but keep going. Repeat on the other side of the spine until it’s removed. Save for stock! Now flip over the chicken so the breast is on top and push down until you feel or hear a crack, this breaks the breastbone and flattens the chicken.
How do you make BBQ glazed chicken?
Preparing the Chicken
Preheat the oven to 450 F. In a small bowl, mix together smoked paprika, dried oregano, kosher salt and garlic powder, set aside. Remove the chicken from the packaging and put on your sheet tray and pat dry with paper towels. Arrange the chicken so that the breast is against the sheet tray and the backbone is facing you. Using sharp kitchen shears, if desired, remove the wingtips at the joint and save for stock. Next, make cuts on either side of the backbone and remove, save for stock. Remove any extra skin and also save for stock. Open up the bird and flip it over so the breast is on top. Press down on the top of the breast to break the breastbone. Gently loosen the skin from the breast, thighs and legs with your fingers. Add the dry rub mixture under the skin all around the bird, trying to make sure each area is covered with dry rub; the meat should be well seasoned. You should use most of the dry rub on the meat and save one to two teaspoons for the skin and get into all the nooks and crannies. Add one to two tablespoons of canola oil and rub into skin. Position the chicken, skin side up in the center of a sheet tray. Arrange the legs so the thighs are exposed.
Preparing the Vegetables
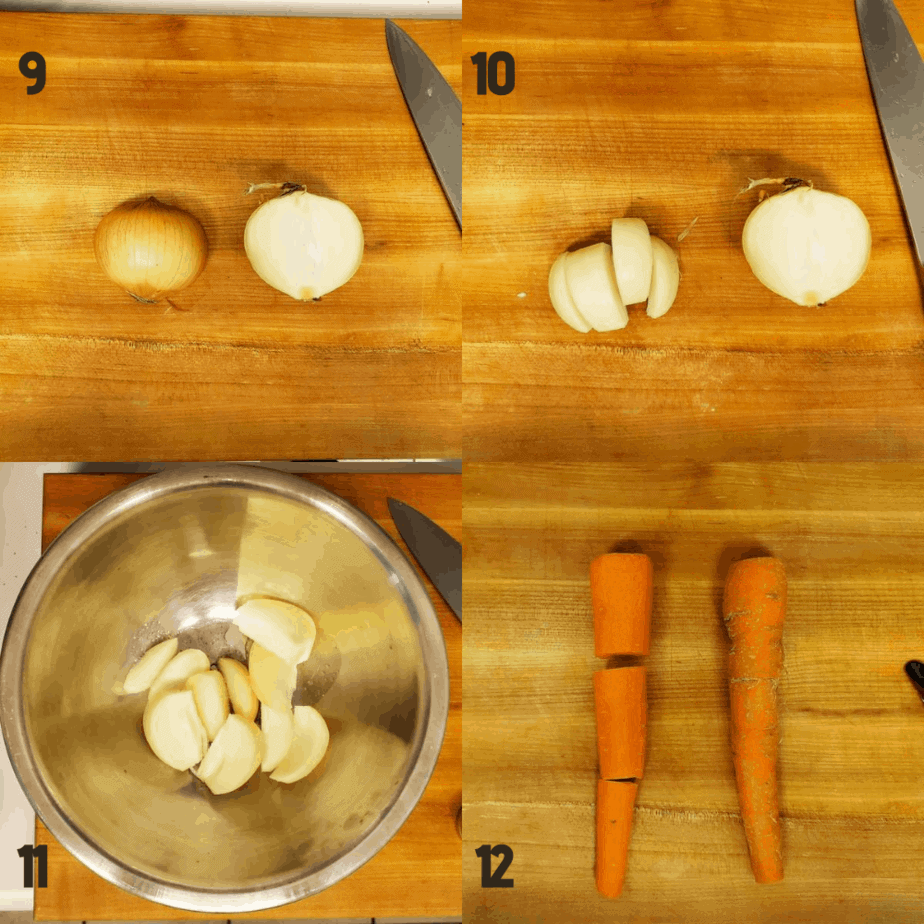
Cut the onion in half and remove the top, root and skin of each half. Cut each half into three to four even pieces. Toss pieces lightly in canola oil and season well with kosher salt. Peel carrots and cut off the ends. Chop carrots up into even pieces; about ½ inch to one inch in size. Toss lightly in canola oil and season well with kosher salt. Cut baby potatoes in half or quarters depending on the size and toss lightly in canola oil and season well with kosher salt. Add all vegetables to the sheet tray in one layer around the chicken cut side down.
Cooking the Sheet Pan Meal
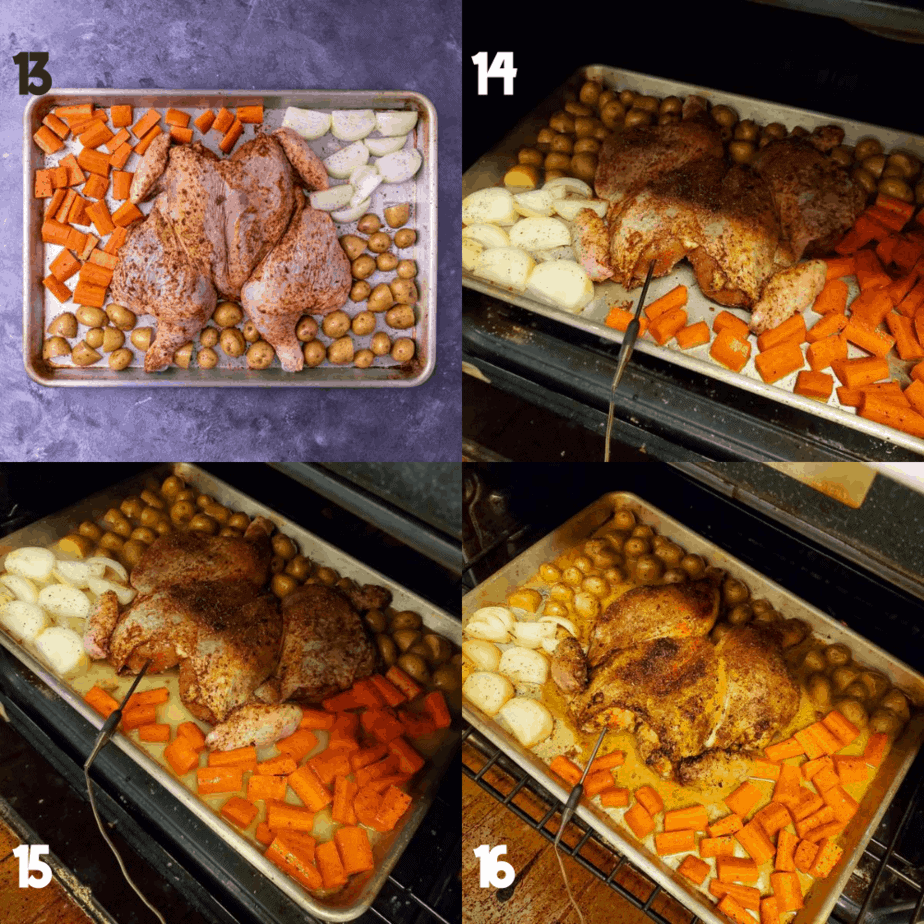
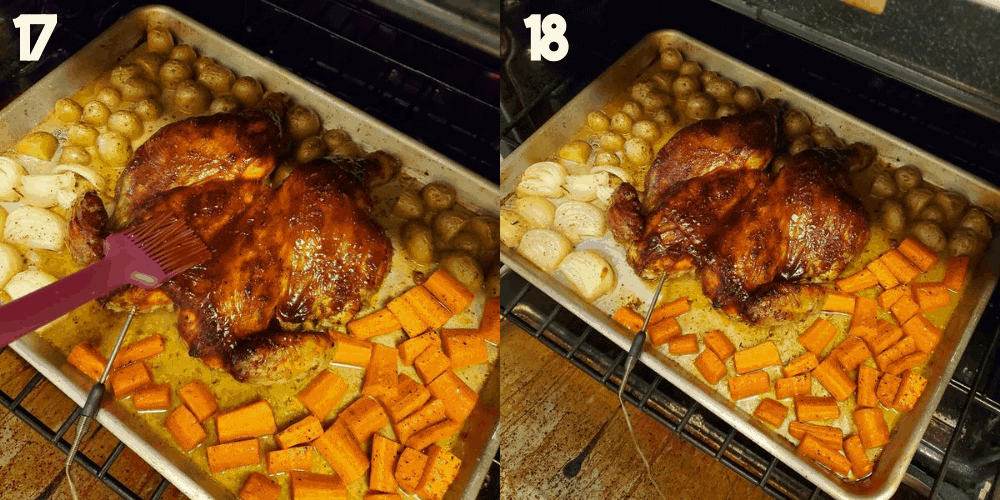
If using, add a meat thermometer alarm probe deep into the breast, connect to the thermometer and set it to 120 F. Carefully, place the sheet tray on the middle rack with the breast towards the front. Add enough broth to just cover the bottom of the sheet tray and cook for 20 minutes (or until 120 F alarm goes off). Once time is up, slide out the sheet tray and add a light layer of BBQ sauce to the chicken skin with a brush. Cook for 7 more minutes (or until 135 F internally). Next, slide out the sheet tray and add another light layer of BBQ sauce to the chicken. Finishing cooking the chicken until chicken breast registers 155 F internally or about 10-13 minutes longer. Add a little more chicken stock if you notice any dry spots on the sheet tray. If using an alarm probe, double check the temperature of the breast and make sure the thighs register at least 165-170 F. If you’re not using a thermometer, check to see if the thigh removes easily from the rest of the chicken. Remove the sheet tray from the oven and rest chicken for at least 10 minutes. Check vegetables for doneness, they should be fork tender. If not, remove the chicken from the sheet tray to a cutting board and cook vegetables for 10 more minutes while the chicken rests. Carve chicken as desired and serve with roasted vegetables.
How do you add the spice mix under the skin? Gently, place your fingers between the skin of the chicken and the meat and slowly work your way loosening the two from each other. Once this is done with (hopefully) minimal holes, you can add some of the spice mix under the skin and rub it around. I’ve found that practice helps and to be patient. If you are finding a few stubborn parts, just do your best, it’ll be tasty and flavorful even if it isn’t 100% covered.
Does it matter how you arrange the raw chicken on the sheet pan? Yes, make sure the chicken is laid flat by cracking the breastbone. Ensure the breast side is facing up and the legs are splayed out so that the thighs are exposed with the most surface area. The chicken thighs take the longest to cook so you want to expose them to the heat as much as you can.
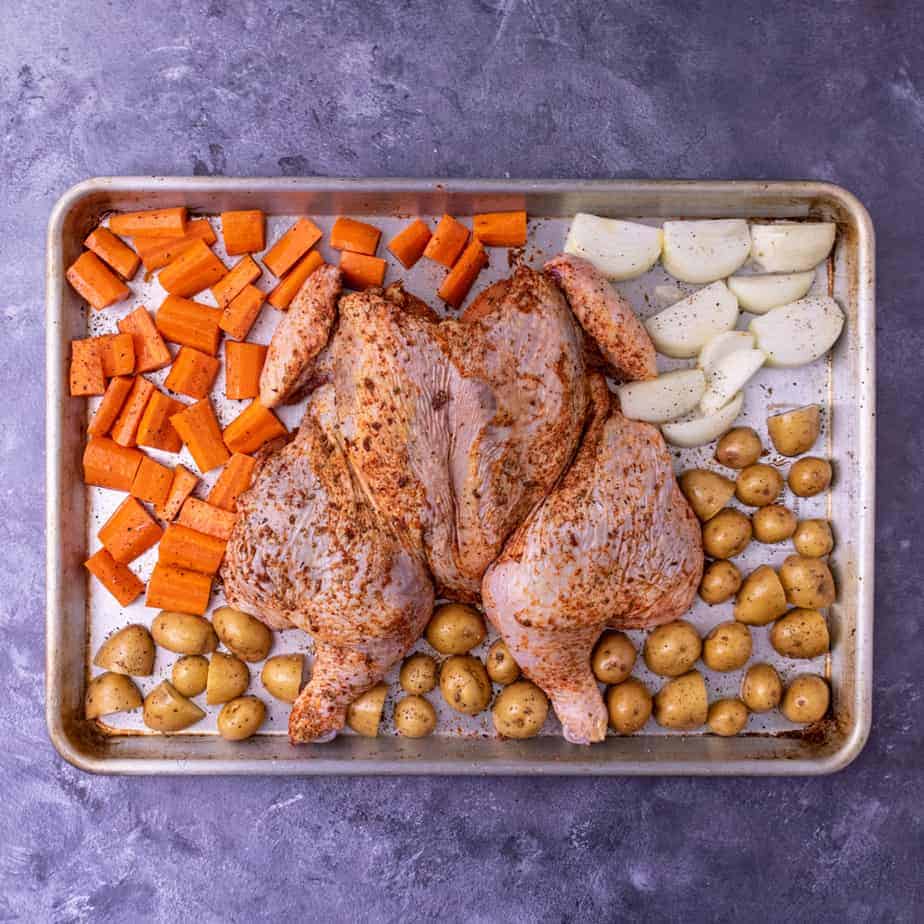
Does it matter how you place the chicken in the oven? This depends on your oven. I know that my oven is definitely hotter in the back so I always make sure to put the thighs back there because they can cook longer and not become dry. I like to make sure the breast of the chicken is facing towards the door, this also makes it easier to check temperatures and glaze with the BBQ sauce. Each oven is different so experiment what works better for you.
How do you know when the chicken is done cooking? The best way to know when any meat is done is with a meat thermometer, it simply takes the guesswork out of cooking a protein correctly. The target temperature for this recipe is 155 F in the breast. While the chicken is resting, the temperature will increase 5-10 degrees and be perfectly juicy and cooked. The best way to do this is with an alarm type meat thermometer inserted during cooking, This will alert you when the chicken has reached a certain temperature. However, another way to check if the chicken is to see if the thigh and drumstick pull away very easily and the juices run clear. Try to avoid cutting into the chicken as it will release a lot of juice but it will work in a pinch.
How do you check the temperature of the chicken to make sure it’s done? When checking the temperature of a whole roast chicken, always check the breast first. Insert the probe into the thickest part of the breast WITHOUT hitting bone. I keep sliding it until I get the lowest temperature. That temperature should at least be 155 F for the rest of the bird to be done. To check the thighs, insert the probe into the thickest part and avoid hitting the bone.
How do you cut a chicken to serve? I first cut off the breast, leaving the bone attached to the rest of the chicken and serve that for dinner. To learn how to completely carve the chicken, you can check out this video by Binging with Babish on YouTube (it also shows you how to spatchcock!)
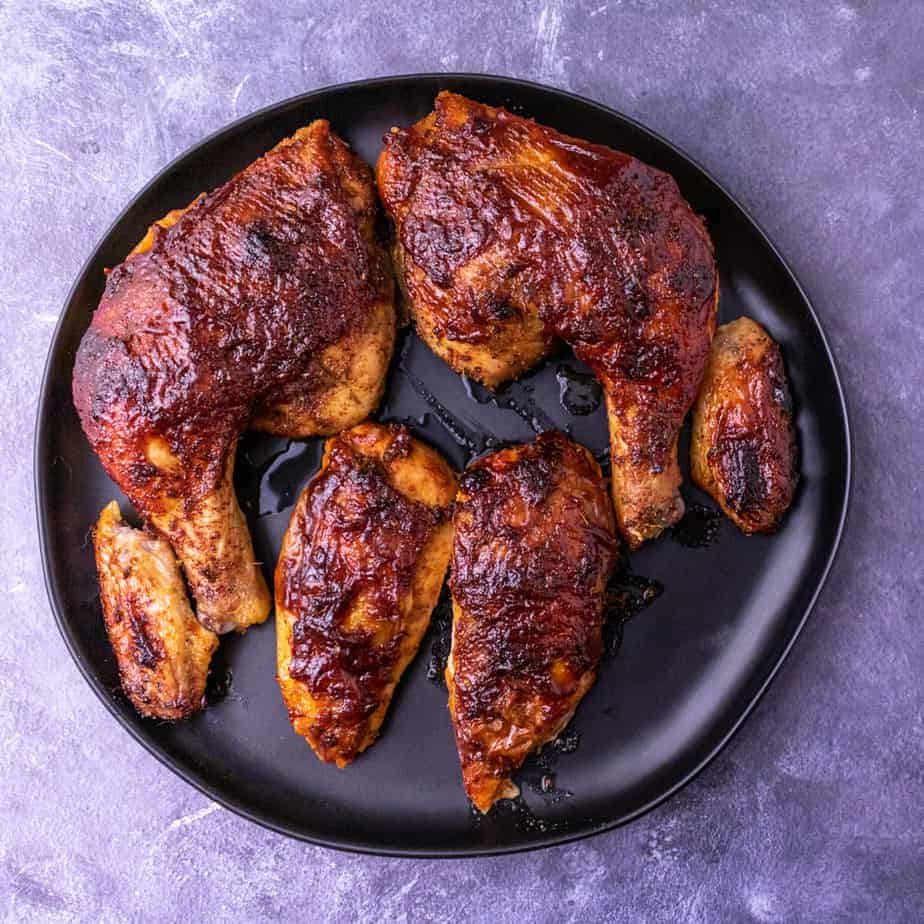
Do you really need to let the chicken rest? Yes, you do need to wait the 10 minutes while letting your roasted chicken rest. This will result in a fully cooked, juicy and tender chicken. Also, you are less likely to burn your fingers carving it.
Help! My vegetables aren’t done at the same time as the chicken. If your vegetables aren’t done (fork tender and slightly caramelized) at the same time as the chicken, remove the chicken from the sheet pan and place on a platter or cutting board. Pop the vegetables back into the oven for 5-10 minutes while letting the chicken rest.
Ingredients
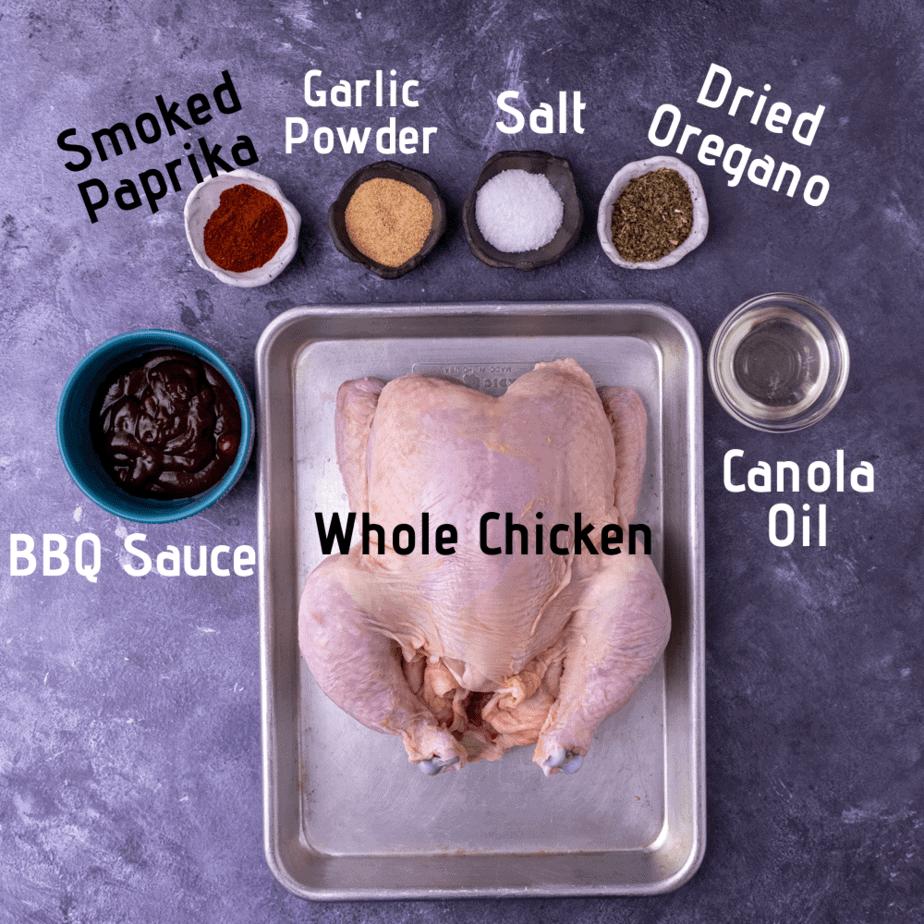
What’s the best BBQ sauce to use? My favorite BBQ sauce is Sweet Baby Ray’s BBQ sauce because it isn’t overly sweet and has a nice balance of flavor. You can use your favorite BBQ sauce for this recipe.
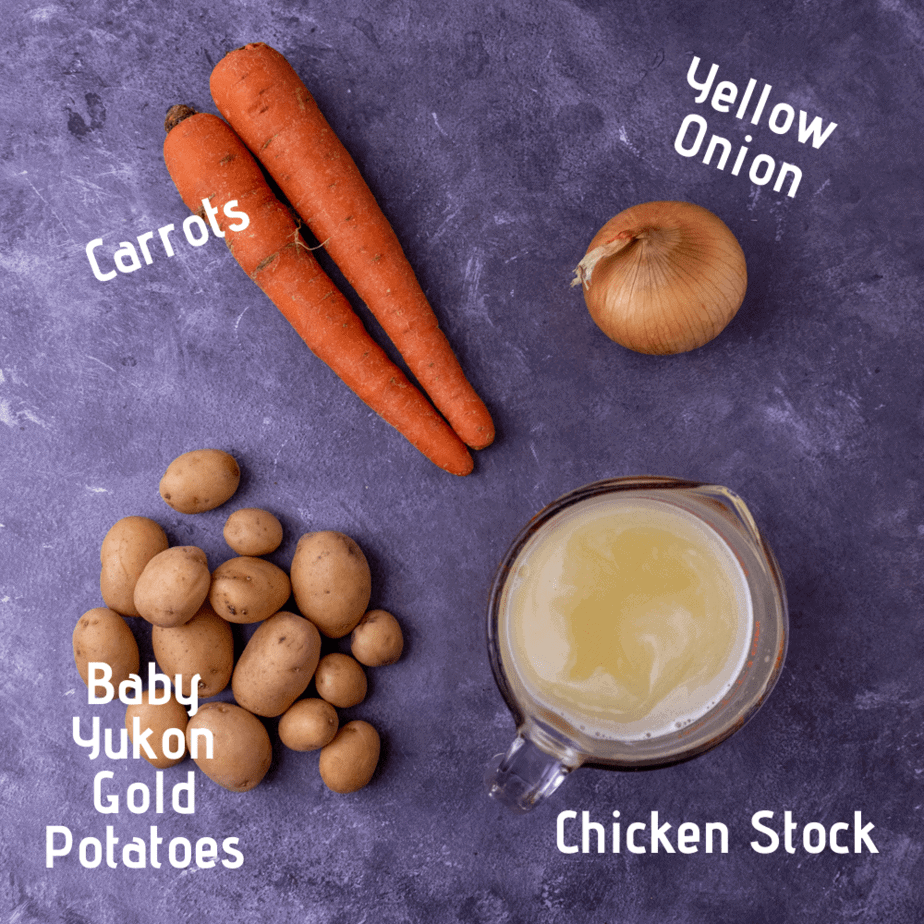
What other vegetables can you roast with the chicken? The key to any sheet tray dinner is making sure you choose vegetables that will finish around the same time. Choose heartier vegetables like butternut squash, cauliflower, brussel sprouts, turnips, parsnips, sweet potatoes or even rutabagas. If you want to roast something like asparagus or mushrooms, I recommend adding them later in the cooking process so they don’t overcook. Cooking time may vary with different vegetables and make sure to keep the sizes uniform when cutting.
Leftovers
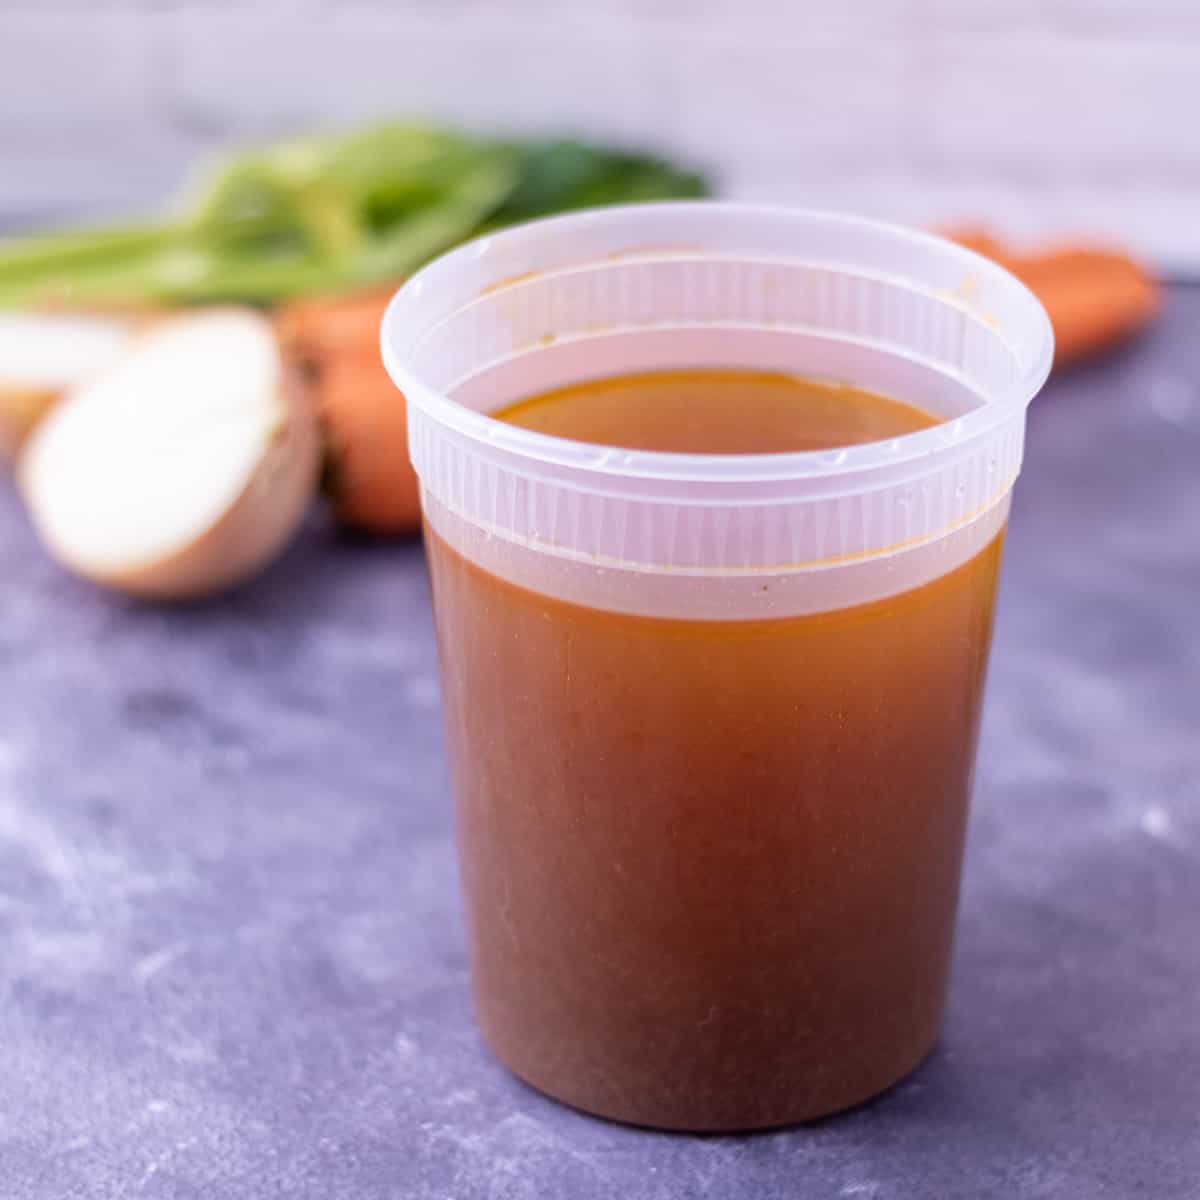
Can you make chicken stock from the leftover chicken bones? Yes! Pick as much meat off the bones as you want. Store the leftover bones with the cut out backbone and wing tips to make a cheap chicken stock. If you’re not looking to make stock immediately after roasting a chicken, store in the freezer until ready to use. Simmer on the stove with carrots, onions, celery and fresh herbs to make a delicious base for soup. This is a great way to reduce food waste! Plus it tastes a lot better than anything you can buy in the store.
What can you do with the removed chicken spine and wing tips? Save these for chicken stock! They have a lot of great flavor and collagen in them. When added to stock, they give a great mouthfeel that homemade stock often has. Store in the fridge in an airtight container if you’re going to make stock in one or two days. Otherwise store in the freezer to make stock later.
What can you do with leftover roasted chicken? If you have leftover chicken, you can make chicken soup, chicken caesar wraps/salad, quesadillas or burritos or just have it with more BBQ sauce and some more sides!
How do you store leftover roasted chicken? After dinner, pick the meat from the bones and store in an airtight container for up to three days in the fridge. Store leftover chicken bones in the fridge if you’re going to make stock within two days or in the freezer in a ziplock for future stock for up to six months.
You May Also Like
- Easy Slow Cooker BBQ Ribs
- Pressure Cooker or Slow Cooker BBQ Pulled Pork
- Chicken Sausage Sheet Pan Meal Prep
- Harissa Chicken Tray Bake
- Traeger Smoked Spatchcocked Chicken
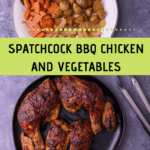
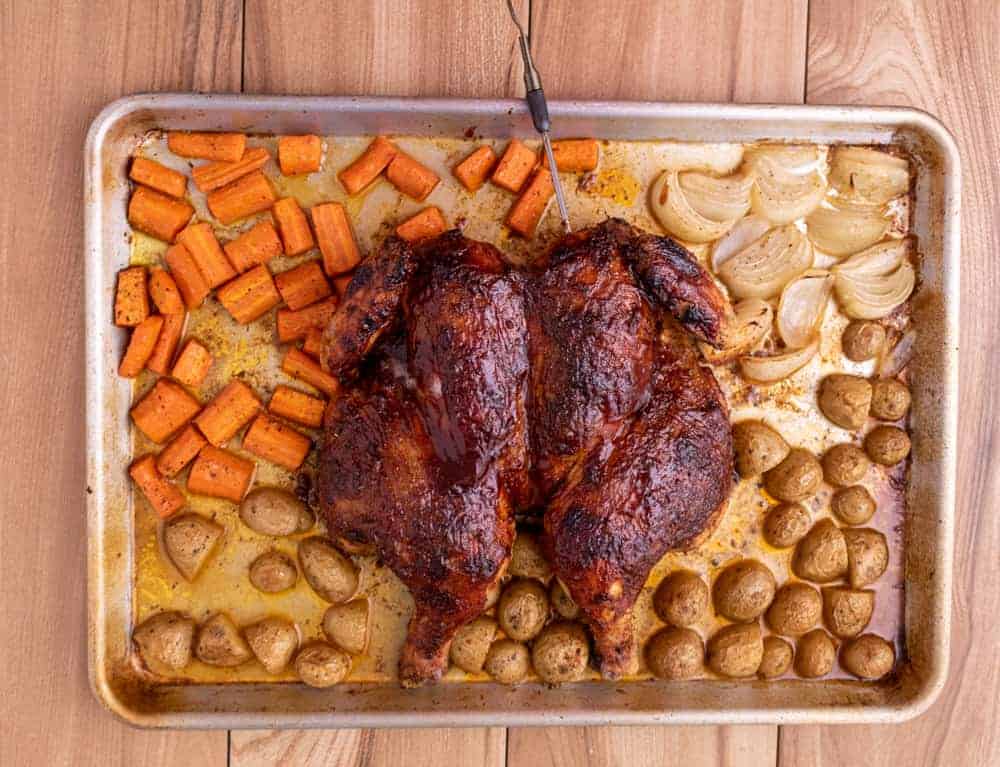
Spatchcock BBQ Glazed Chicken with Vegetables
Ingredients
Spatchcock Chicken
- 3-4 lb raw whole chicken
- 2 tablespoons smoked paprika
- 1 ½ tablespoons dried oregano
- 1 tablespoon garlic powder
- 1 tablespoon kosher salt Diamond Crystal Kosher, if using another kosher salt use ½ tablespoon
- 1-2 tablespoons canola oil
- 1 - 1 ½ cups BBQ sauce
Roasted Vegetables
- 1 medium yellow onion
- 2 large carrots
- ½ pound baby yukon gold potatoes
- 1-2 tablespoons canola oil
- Kosher salt to taste
- 1-2 cups low sodium chicken or vegetable broth
Instructions
Prepping the Chicken
- Preheat the oven to 450 F and place a rack in the middle position.
- In a small bowl, mix together smoked paprika, dried oregano, kosher salt and garlic powder, set aside.
- Take the chicken from the packaging, drain any juices and remove anything in the cavity. Place on your sheet tray and pat dry with paper towels. Arrange the chicken so that the backbone is facing you. Using sharp kitchen shears, if desired, remove the wingtips at the joint and save for stock. Make one cut starting at the bottom (where the legs are) of the chicken and going towards the neck (where the wings are) on one side of the backbone. You’re going to cut through the ribcage but keep going. Repeat on the other side of the spine until it’s removed. Save for stock!
- Open up the bird and flip it over so the skin is on top. Press down on the top of the breast to break the breast bone, making the bird lay down flatter.
- Loosen the skin from the breast, thighs and legs gently with your fingers . Add the dry rub mixture under the skin all around the bird, trying to make sure each area is covered with dry rub, the meat should be well seasoned. You should use most of the dry rub on the meat and save roughly 1-2 teaspoons for the skin and get into all the nooks and crannies. Add 1-2 tablespoons of canola oil and rub into skin.
- Position the chicken, skin side up in the center of a sheet tray. Arrange the legs so the thighs are exposed.
Preparing the Vegetables
- Cut the onion in half through the root. Remove the top, root and skin of each half. Cut each half into 3-4 even pieces. Toss pieces lightly in canola oil and season well with kosher salt. Add to the sheet tray in 1 layer around the chicken.
- Peel carrots and cut off the ends. Chop carrots up into even pieces about ½ inch to 1 inch in size. Toss lightly in canola oil and season well with kosher salt. Add to the sheet tray in 1 layer around the chicken.
- Cut baby potatoes in half or quarters depending on the size and toss lightly in canola oil and season well with kosher salt. Add to the sheet tray in 1 layer around the chicken cut side down. It is okay if the vegetables are crowding around a bit, you’re not looking for crispy edges.
Cooking the Sheet Pan Meal
- Make sure all vegetables are in a single layer around the chicken. If using, add a meat thermometer alarm probe deep into the breast without touching bone, connect to the thermometer and set it to 120 F.
- Carefully, place the sheet tray on the middle rack with the breast towards the front. Add enough broth to just cover the bottom of the sheet tray and cook for 20 minutes (or until 120 F alarm goes off).
- After 20 minutes, slide out the sheet tray and add a light layer of BBQ sauce to the chicken skin with a pastry brush. Try to cover all visible skin and cook for 7 more minutes (or until 135 F internally). Add a little more chicken stock if you notice any dry spots on the sheet tray.
- After 7 more minutes, slide out the sheet tray and add another light layer of BBQ sauce to the chicken. Cook until chicken breast registers 155 F internally or 10-13 minutes longer. Add a little more chicken stock if you notice any dry spots on the sheet tray.
- If using an alarm probe, double check the temperature of the breast in a few spots and make sure thighs register at least 170 F. If you’re not using a thermometer, check to see if the thigh removes easily from the rest of the chicken.
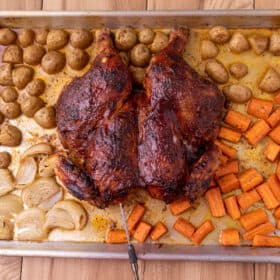
- Once cooked, remove the sheet tray from the oven and rest chicken for at least 10 minutes. Check vegetables for doneness, they should be fork tender. If not, remove the chicken from the sheet tray to a cutting board and cook vegetables for 10 more minutes while the chicken rests.
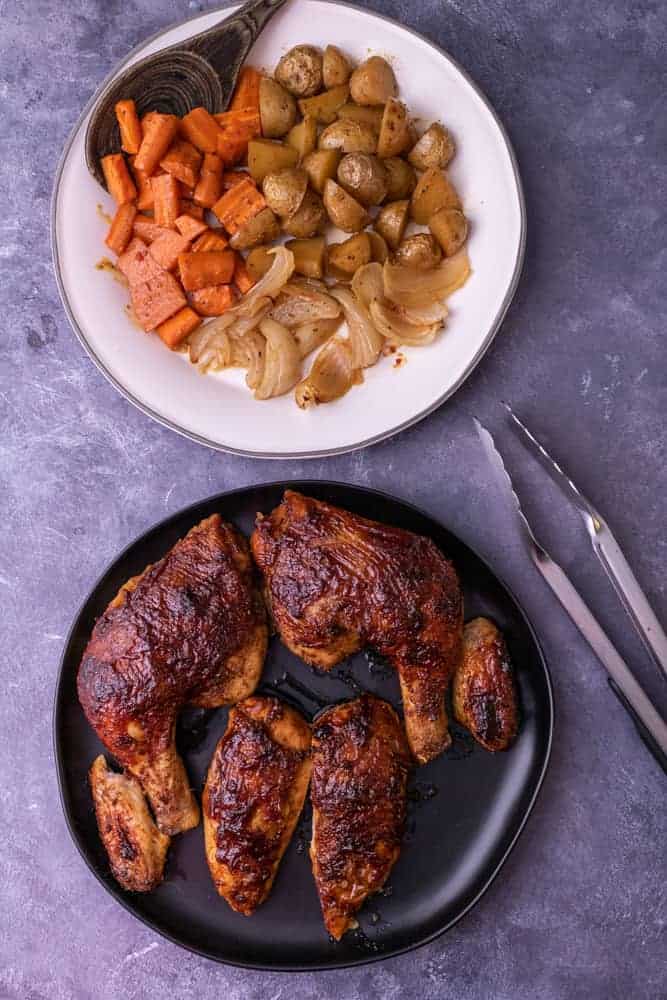
- Carve chicken as desired and serve with roasted vegetables.
Notes and Accommodations
- The vegetable measurements are approximations.
- If you don’t have kitchen shears, ask your butcher to spatchcock the chicken for you.
- Save the backbone and wingtips for stock plus leftover bones.
- Make sure all vegetables and chicken are in a single layer to ensure even cooking.
- It is easier to put the tray in the oven and then add the broth.
- Chicken is cooked at an internal temperature of 155 F with a 10 minute rest or when the juices run clear and the thighs separate easily.
- If using anything beside Diamond Crystal Kosher salt, use ½ of amount.
- Store leftovers in the fridge in an airtight container for up to 3 days.

